Troubleshooting Your Craftsman Vape’s Draw
Experiencing a weak or inconsistent hit from your Craftsman Series vape can be frustrating. Whether it’s a new device or one that’s been used for a while, there are several common culprits behind a diminished vaping experience. From airflow issues to coil problems, this guide will walk you through troubleshooting steps to help restore your Craftsman vape to its former glory and deliver powerful, satisfying hits every time.
Check the Coil
Experiencing a weak or inconsistent hit from your Craftsman Series vape can be frustrating. Whether it’s a new device or one that’s been used for a while, there are several common culprits behind a diminished vaping experience. From airflow issues to coil problems, this guide will walk you through troubleshooting steps to help restore your Craftsman vape to its former glory and deliver powerful, satisfying hits every time.
One of the most frequent reasons for a weak hit is a dirty or burnt-out coil. The coil is responsible for heating the e-liquid, producing vapor. Over time, the wicking material can become clogged with residue, preventing proper absorption of the e-liquid and leading to a lackluster vape.
- Inspect your coil closely. If you notice blackening or scorching on the coil itself or a burnt taste when you vape, it’s time for a replacement.
- Remove the old coil and install a new one, ensuring it is properly seated in the device.
Inspect for Damage
Another possible reason for a weak draw is a restricted airflow path. Airflow is essential to creating the right pressure and temperature for vapor production. Check the mouthpiece and any adjustable air vents on your Craftsman vape.
- Make sure the mouthpiece isn’t obstructed by debris or a buildup of e-liquid.
- If your vape has adjustable airflow, experiment with different settings to find one that provides a good balance between restriction and airflow.
Replace the Coil
One common issue that can lead to a weak hit on your Craftsman Series vape is a dirty or burnt-out coil. The coil heats the e-liquid to produce vapor, so if it’s clogged with residue or damaged, it won’t be able to heat efficiently.
- Inspect your coil carefully for any signs of blackening, scorching, or a burnt taste when vaping. These are indicators that the coil needs replacing.
- Remove the old coil and insert a new one, ensuring it’s securely seated in your device.
Another potential cause for a weak draw is restricted airflow. Airflow is crucial for creating the right pressure and temperature needed for proper vapor production.
- Ensure that the mouthpiece isn’t blocked by debris or e-liquid buildup.
- If your Craftsman vape has adjustable airflow, experiment with different settings to find one that provides a good balance between restriction and airflow.
Examine the Wick
To diagnose a weak draw on your Craftsman vape, begin by examining the wick. The wick is responsible for drawing e-liquid up to the coil. A dirty or burnt wick can lead to poor vapor production.
Remove the coil from your device and carefully inspect the wick. Look for any signs of discoloration, dryness, or a buildup of residue. If the wick appears damaged or clogged, it’s time to replace it.
Replacing the wick is usually part of replacing the entire coil unit as they are typically integrated. Be sure to follow the manufacturer’s instructions for installing a new coil.
Ensure Proper Saturation
Ensure that your Craftsman vape is properly saturated with e-liquid. A lack of sufficient e-liquid in the tank or cartridge can lead to a weak draw. Check the fluid level and refill as needed.
After refilling, allow a few moments for the e-liquid to be drawn up into the wicking material. Take a slow puff to ensure the e-liquid reaches the coil.
Replace the Wick
One common issue that can lead to a weak hit on your Craftsman Series vape is a dirty or burnt-out coil. The coil heats the e-liquid to produce vapor, so if it’s clogged with residue or damaged, it won’t be able to heat efficiently.
- Inspect your coil carefully for any signs of blackening, scorching, or a burnt taste when vaping. These are indicators that the coil needs replacing.
- Remove the old coil and insert a new one, ensuring it’s securely seated in your device.
Another potential cause for a weak draw is restricted airflow. Airflow is crucial for creating the right pressure and temperature needed for proper vapor production.
- Ensure that the mouthpiece isn’t blocked by debris or e-liquid buildup.
- If your Craftsman vape has adjustable airflow, experiment with different settings to find one that provides a good balance between restriction and airflow.

To diagnose a weak draw on your Craftsman vape, begin by examining the wick. The wick is responsible for drawing e-liquid up to the coil. A dirty or burnt wick can lead to poor vapor production.
Remove the coil from your device and carefully inspect the wick. Look for any signs of discoloration, dryness, or a buildup of residue. If the wick appears damaged or clogged, it’s time to replace it.
Replacing the wick is usually part of replacing the entire coil unit as they are typically integrated. Be sure to follow the manufacturer’s instructions for installing a new coil.
Ensure that your Craftsman vape is properly saturated with e-liquid. A lack of sufficient e-liquid in the tank or cartridge can lead to a weak draw. Check the fluid level and refill as needed.
After refilling, allow a few moments for the e-liquid to be drawn up into the wicking material. Take a slow puff to ensure the e-liquid reaches the coil.
Cleaning and Maintenance
A weak or inconsistent hit from your Craftsman Series vape can be frustrating. This guide will walk you through common culprits behind a diminished vaping experience, from airflow issues to coil problems, and provide troubleshooting steps to help restore your Craftsman vape to its former glory.
Clean the Tank
Cleaning your vape tank regularly is essential for maintaining optimal performance and flavor. A buildup of residue can restrict airflow, clog the wick, and negatively impact your vaping experience.
To clean your Craftsman Series vape tank, start by removing it from the device.
- Rinse the tank with warm, soapy water. Use a soft brush to gently scrub away any visible residue or buildup.
- Rinse the tank thoroughly with clean water to remove all soap residue.
- Allow the tank to air dry completely before reassembling it.
For stubborn residue, you can soak the tank in a mixture of warm water and white vinegar for 15-20 minutes. Rinse thoroughly with clean water afterwards.
Remove Debris
Remove any debris from the mouthpiece and airflow openings. A clogged mouthpiece or restricted airflow will make it difficult to draw vapor.
Clean the tank regularly to prevent residue buildup. Residue can affect both airflow and flavor.
Inspect the coils for damage or discoloration. Replace them if they are burnt or dirty.
Rinse Thoroughly
One common issue that can lead to a weak hit on your Craftsman Series vape is a dirty or burnt-out coil. The coil heats the e-liquid to produce vapor, so if it’s clogged with residue or damaged, it won’t be able to heat efficiently.
- Inspect your coil carefully for any signs of blackening, scorching, or a burnt taste when vaping. These are indicators that the coil needs replacing.
- Remove the old coil and insert a new one, ensuring it’s securely seated in your device.
Another potential cause for a weak draw is restricted airflow. Airflow is crucial for creating the right pressure and temperature needed for proper vapor production.
- Ensure that the mouthpiece isn’t blocked by debris or e-liquid buildup.
- If your Craftsman vape has adjustable airflow, experiment with different settings to find one that provides a good balance between restriction and airflow.
To diagnose a weak draw on your Craftsman vape, begin by examining the wick. The wick is responsible for drawing e-liquid up to the coil. A dirty or burnt wick can lead to poor vapor production.
Remove the coil from your device and carefully inspect the wick. Look for any signs of discoloration, dryness, or a buildup of residue. If the wick appears damaged or clogged, it’s time to replace it.
Replacing the wick is usually part of replacing the entire coil unit as they are typically integrated. Be sure to follow the manufacturer’s instructions for installing a new coil.
Ensure that your Craftsman vape is properly saturated with e-liquid. A lack of sufficient e-liquid in the tank or cartridge can lead to a weak draw. Check the fluid level and refill as needed.
After refilling, allow a few moments for the e-liquid to be drawn up into the wicking material. Take a slow puff to ensure the e-liquid reaches the coil.
Cleaning your vape tank regularly is essential for maintaining optimal performance and flavor. A buildup of residue can restrict airflow, clog the wick, and negatively impact your vaping experience.
To clean your Craftsman Series vape tank, start by removing it from the device.
- Rinse the tank with warm, soapy water. Use a soft brush to gently scrub away any visible residue or buildup.
- Rinse the tank thoroughly with clean water to remove all soap residue.
- Allow the tank to air dry completely before reassembling it.
For stubborn residue, you can soak the tank in a mixture of warm water and white vinegar for 15-20 minutes. Rinse thoroughly with clean water afterwards.
Remove any debris from the mouthpiece and airflow openings. A clogged mouthpiece or restricted airflow will make it difficult to draw vapor.
Clean the tank regularly to prevent residue buildup. Residue can affect both airflow and flavor.
Inspect the coils for damage or discoloration. Replace them if they are burnt or dirty.
Clean the Airflow Control
Cleaning your Craftsman vape’s airflow control is crucial for maintaining a good vaping experience. Over time, residue from e-liquid and vapor can build up in the airflow pathway, restricting airflow and impacting vapor production. Here’s how to clean the airflow control on your Craftsman Series vape:
-
Identify the Airflow Control: Carefully examine your Craftsman vape for adjustable airflow openings or vents. These are typically located near the mouthpiece or base of the device.
-
Disassemble (if possible): If your Craftsman model allows for disassembly, carefully remove any parts that cover the airflow control. Consult your user manual for specific instructions.
-
Use a Soft Brush: A small, soft-bristled brush can be used to gently dislodge debris from the airflow openings. Avoid using sharp objects or abrasive materials that could damage the vape.
-
Compressed Air (Optional): If you have access to compressed air, use short bursts to blow away loose residue from the airflow control. Hold the can upright and keep it a safe distance from the device to avoid condensation.
-
Soak in Vinegar Solution: For stubborn buildup, soak a cotton swab in a mixture of warm water and white vinegar. Gently clean the airflow control openings with the swab.
-
Rinse and Dry: Thoroughly rinse the airflow control area with clean water to remove any residue from cleaning solutions. Allow all parts to air dry completely before reassembling.
Remember to always refer to your Craftsman vape’s user manual for specific instructions on cleaning and maintenance.
Remove Blockages
Experiencing a weak or inconsistent hit from your Craftsman Series vape can be frustrating. Whether it’s a new device or one that’s been used for a while, there are several common culprits behind a diminished vaping experience. From airflow issues to coil problems, this guide will walk you through troubleshooting steps to help restore your Craftsman vape to its former glory and deliver powerful, satisfying hits every time.
One of the most frequent reasons for a weak hit is a dirty or burnt-out coil. The coil is responsible for heating the e-liquid, producing vapor. Over time, the wicking material can become clogged with residue, preventing proper absorption of the e-liquid and leading to a lackluster vape.
- Inspect your coil closely. If you notice blackening or scorching on the coil itself or a burnt taste when you vape, it’s time for a replacement.
- Remove the old coil and install a new one, ensuring it is properly seated in the device.
Another possible reason for a weak draw is a restricted airflow path. Airflow is essential to creating the right pressure and temperature for vapor production. Check the mouthpiece and any adjustable air vents on your Craftsman vape.
- Make sure the mouthpiece isn’t obstructed by debris or a buildup of e-liquid.
- If your vape has adjustable airflow, experiment with different settings to find one that provides a good balance between restriction and airflow.
To diagnose a weak draw on your Craftsman vape, begin by examining the wick. The wick is responsible for drawing e-liquid up to the coil. A dirty or burnt wick can lead to poor vapor production.
Remove the coil from your device and carefully inspect the wick. Look for any signs of discoloration, dryness, or a buildup of residue. If the wick appears damaged or clogged, it’s time to replace it.
Replacing the wick is usually part of replacing the entire coil unit as they are typically integrated. Be sure to follow the manufacturer’s instructions for installing a new coil.
Ensure that your Craftsman vape is properly saturated with e-liquid. A lack of sufficient e-liquid in the tank or cartridge can lead to a weak draw. Check the fluid level and refill as needed.
After refilling, allow a few moments for the e-liquid to be drawn up into the wicking material. Take a slow puff to ensure the e-liquid reaches the coil.
Cleaning your vape tank regularly is essential for maintaining optimal performance and flavor. A buildup of residue can restrict airflow, clog the wick, and negatively impact your vaping experience.
To clean your Craftsman Series vape tank, start by removing it from the device.
- Rinse the tank with warm, soapy water. Use a soft brush to gently scrub away any visible residue or buildup.
- Rinse the tank thoroughly with clean water to remove all soap residue.
- Allow the tank to air dry completely before reassembling it.
For stubborn residue, you can soak the tank in a mixture of warm water and white vinegar for 15-20 minutes. Rinse thoroughly with clean water afterwards.
Remove any debris from the mouthpiece and airflow openings. A clogged mouthpiece or restricted airflow will make it difficult to draw vapor.
Clean the tank regularly to prevent residue buildup. Residue can affect both airflow and flavor.
Inspect the coils for damage or discoloration. Replace them if they are burnt or dirty.
One common issue that can lead to a weak hit on your Craftsman Series vape is a dirty or burnt-out coil. The coil heats the e-liquid to produce vapor, so if it’s clogged with residue or damaged, it won’t be able to heat efficiently.
- Inspect your coil carefully for any signs of blackening, scorching, or a burnt taste when vaping. These are indicators that the coil needs replacing.
- Remove the old coil and insert a new one, ensuring it’s securely seated in your device.
Another potential cause for a weak draw is restricted airflow. Airflow is crucial for creating the right pressure and temperature needed for proper vapor production.
- Ensure that the mouthpiece isn’t blocked by debris or e-liquid buildup.
- If your Craftsman vape has adjustable airflow, experiment with different settings to find one that provides a good balance between restriction and airflow.
Remember to always refer to your Craftsman vape’s user manual for specific instructions on cleaning and maintenance.
Airflow Settings Adjustment
Adjusting the airflow on your Craftsman Series vape can significantly impact the quality of your vaping experience. Proper airflow allows for efficient vapor production, flavor enhancement, and a satisfying draw. Here’s a guide to help you fine-tune the airflow settings:
Locate the Airflow Control: Your Craftsman Series vape should have adjustable airflow openings or vents. These are typically found near the mouthpiece or base of the device. Consult your user manual for specific details about your model.
Experiment with Different Settings: Most Craftsman vapes offer a range of airflow settings. Start by experimenting with different positions to find a balance between restriction and airflow:
-
**Restricted Airflow:**
This setting creates more resistance when you inhale, resulting in a tighter, cooler draw. It can be preferable for vaping high-viscosity e-liquids or if you prefer a more intense flavor experience.
-
**Moderate Airflow: ** This provides a good compromise between restriction and airflow, delivering a balanced vape with moderate vapor production and flavor. It’s often a good starting point for most vapers.
-
Wide Open Airflow:** This setting offers the least resistance, resulting in a looser, warmer draw with larger vapor clouds. It’s suitable for direct lung (DL) vaping and high-PG e-liquids.
Adjust Based on Your Preferences: The ideal airflow setting is subjective and depends on your personal preferences, the type of e-liquid you are using, and your vaping style. Don’t hesitate to experiment until you find what works best for you.
Find Optimal Setting
Finding the optimal airflow setting for your Craftsman Series vape involves a bit of experimentation, but here’s a guide to help you on your journey:
**Understanding Airflow:** Airflow plays a crucial role in your vaping experience. It influences vapor production, temperature, and flavor.
* **Restricted Airflow:** This creates more resistance as you inhale, leading to tighter draws, cooler vapor, and potentially more intense flavors.
* Ideal for: High-viscosity e-liquids, direct lung (DL) vaping, or if you prefer a stronger flavor hit.
* **Moderate Airflow:** Offers a balanced compromise between restriction and airflow, delivering a comfortable draw with adequate vapor production and balanced flavor. A good starting point for most vapers.
* Ideal for: Versatile vaping styles, various e-liquid viscosities.
* **Wide Open Airflow:** Minimizes resistance, resulting in loose draws, warmer vapor, and larger clouds.
* Ideal for: DL vaping, high PG e-liquids, cloud chasing.
**Steps to Finding Your Sweet Spot:**
1. **Locate Your Airflow Control:** Check your Craftsman vape’s manual or the device itself for adjustable airflow openings (often near the mouthpiece).
2. **Start with Moderate Airflow:** Begin in the middle range of airflow settings. This provides a good baseline for testing.
3. **Adjust and Experiment:** Take a few puffs at this setting and assess:
* **Vapor Production:** Is it sufficient? Do you get nice, full clouds?
* **Flavor Intensity:** Does the flavor come through clearly without being overwhelmed by the vapor?
* **Draw Resistance:** Does the inhale feel comfortable? Too tight, too loose?
4. **Fine-Tune:** Based on your observations:
* **Increase Airflow for Larger Clouds:** If you want more vapor but don’t mind a slightly cooler draw or less intense flavor, open up the airflow slightly.
* **Decrease Airflow for Flavor Emphasis:** If you want a stronger taste, try restricting the airflow a bit (but not too much – it shouldn’t feel like inhaling through a straw!).
**Remember:** Your ideal airflow setting will depend on your preferences and the e-liquid you use. Don’t be afraid to experiment until you find the perfect balance!
Battery Considerations
Airflow control is essential for a satisfying vaping experience with your Craftsman Series vape. It impacts everything from vapor production and flavor intensity to how comfortably you can inhale. Here’s how to fine-tune the airflow on your device:
1. Locate the Airflow Control:
The airflow control mechanism usually resides near the mouthpiece or at the base of your Craftsman vape. Refer to your user manual if you’re unsure about its location.
2. Understand Different Airflow Settings:
Most Craftsman vapes offer adjustable airflow in various degrees:
* **Restricted Airflow:** Creates more resistance, resulting in a tighter draw, cooler vapor, and potentially more intense flavors. Best for thicker e-liquids or direct lung (DL) vaping.
* **Moderate Airflow:** A balanced setting providing adequate vapor production and flavor intensity for a comfortable vaping experience.
* **Wide Open Airflow:** Minimizes resistance, leading to a looser draw, warmer vapor, and larger clouds. Ideal for DL vaping with high PG e-liquids.
3. Experiment and Adjust: Start with moderate airflow as a baseline. Take several puffs and assess the following:
* **Vapor Production:** Do you get satisfyingly thick clouds or is it too light?
* **Flavor Intensity:** Can you taste your e-liquid clearly and distinctly?
* **Draw Resistance:** Does the inhale feel smooth or too restrictive?
4. Fine-Tune Your Settings: Based on your initial assessment, make adjustments:
* **More Vapor?** Open the airflow slightly to increase vapor production.
* **Need More Flavor?** Slightly restrict airflow for a stronger taste.
* **Draw Too Tight?** Open the airflow gradually.
* **Draw Too Loose?** Reduce airflow a bit.
Remember:
Your ideal airflow setting is subjective and may change depending on your preference, e-liquid viscosity, and vaping style. Keep experimenting until you find that sweet spot for optimal flavor, vapor production, and comfort!
Check Battery Level
While air flow controls can make a big difference in your experience, remember to also keep an eye on battery life. The longer or more frequently you vape, the faster your battery will drain.
Checking Your Battery Level
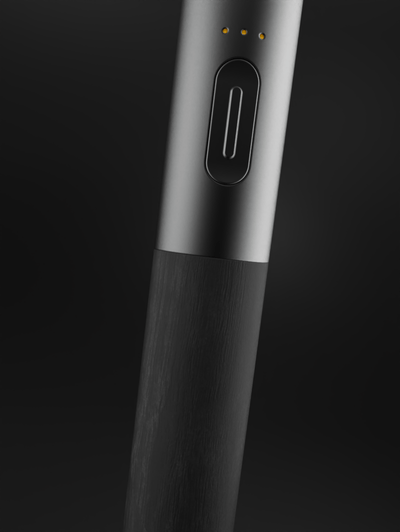
Battery levels typically display through LEDs or a numerical indicator on the device itself. Here are some common ways Craftsman vapes show battery status:
* **LED Lights:** You might see a series of lights, each representing a different percentage of charge.
* **Numerical Display:** Some devices have an LCD screen that directly shows the battery percentage.
* **Battery Icon:** A battery icon on the display may fill up partially or completely to indicate your remaining power.
If your Craftsman vape doesn’t have a clear indication, consult your user manual for specific instructions on how to check the battery level.
Charge the Battery
You should always ensure that you are using the correct charger and cable designed specifically for your Craftsman vape. Using incompatible chargers can potentially damage your device or pose safety hazards.
Charging Tips:
* **Use the Manufacturer’s Charger:** Always use the charger that came with your Craftsman vape or a replacement charger officially approved by the manufacturer.
* **Avoid Overcharging:** Don’t leave your vape plugged in for extended periods after it’s fully charged. This can lead to battery degradation over time.
* **Don’t Charge When Hot:** Allow your vape to cool down before charging, especially after heavy use. Heat can strain the battery.
Charging a Crafstman Vape
To charge your Craftsman vape:
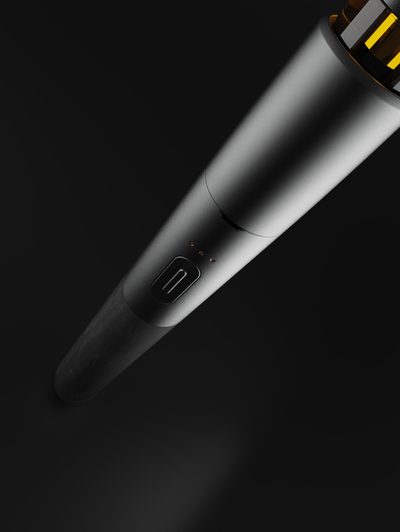
1. Locate the Charging Port: Usually on the base or side of the device.
2. Connect the Charger: Plug one end of the charger cable into the charging port and the other end into a compatible power source (wall adapter, computer USB, etc.).
3. Battery Indicator: Most Craftsman vapes have an indicator (LEDs, display) that shows charging status. Watch for changes in these lights to indicate whether it’s charging or fully charged. 4. Disconnect When Complete: Once the battery is fully charged, unplug the charger from both your vape and the power source.
Let me know if you’d like more information about a specific Craftsman vape model!
Craftsman Series by Vessel – Shop Now
- Retinol Peel For Skin Texture Improvement In Kingston Upon Thames - June 2, 2025
- The Cultural Significance Of Cannabis Beverages - June 1, 2025
- What Is Graysexuality And How Does It Impact Romantic Relationships - June 1, 2025